Tuesday, May 7, 2024

Sunny Studio - Hello Friend

Hello everyone, I am on Sunny Studio blog with a CAS card featuring the Big Panda stamps and dies. This stamp set is gorgeous with beautiful accessories to go with the theme. I decided to create this card for a friend.

I started by die-cutting three circles using the Stitched Circles Large and Small dies. I then sponged picked raspberry, wild honey and dried marigold distress oxide ink to them.  Adhere to a white card base.

Stamp the images, color using copic markers and die-cut using the coordinating dies.

Big Panda, hat, drink and sentiment - Big Panda stamp and dies

Small Panda - Panda Party stamp and dies

Small drink - Tiki Time

Adhere the images to the card using 3d foam. To finish, I added some sequins. Thank you for dropping by and have a nice day!

Monday, April 29, 2024

Pinkfresh Studio “Delightful” Release Blog Hop

Hello everyone! I am so excited to join Pinkfresh Studio "Delightful" release bloghop. This release has a lot of products for a variety of styles.
 

I have a few cards for you today. For the first two cards I am featuring the Joyful Day stamps, dies and stencils, the Diagonal Plaid press plate, Overlapping Geometrics stencils along with the essential diagonal Stitched Rectangles and Folk Edge Rectangles. I've linked all the products below.
 

For the first card I stamped the image using Joyful day stamp set using versamark ink, sprinkle WOW!metallic gold embossing powder and heat set. Next, sponge mint, meadow, misty coast, sunshine, marigold, soft lilac, candy violet inks using the stencils. Die-cut using the dies. 
 

Stamp the image once more onto vellum, sprinkle WOW! razzleberry and sugared embossing powders, heat set and die-cut.
 

Take a white card, add subtle texture by using the Diagonal Plaid press plate without ink. Sponge the lilac inks to the corners. Adhere the images. 
 

Create a frame from the Diagonal Stitched Rectangle dies. Adhere to the card. To finish, adhere the sentiment, the Blush glitter drops and clear with Gold Dust gems.
 
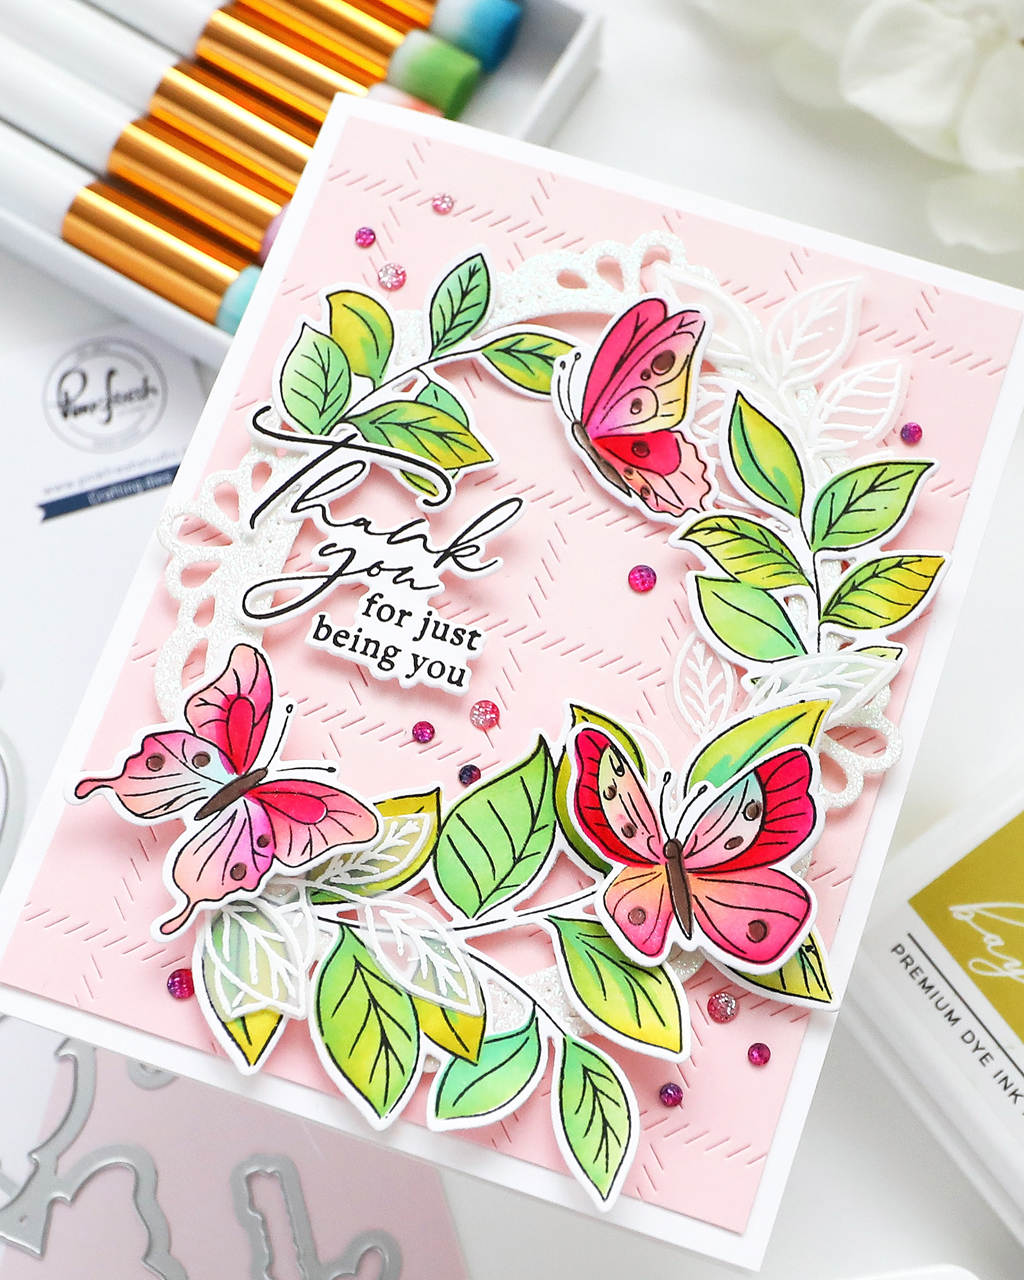
For the next card I sponged peach fuzz, cherry blossom, peony, sunkissed, sparkling rose, coral reef inks through the Overlapping Geometrics layering stencils.
 

 Flick black paint. Die-cut the frame using the Folk Art Rectangle die. 


Add foam tape to adhere it back to the panel. Add the embossed images and the sentiments. 
 
 
To finish, add some Twilight glitter drops.
 
For the 3rd card, I decided to use the Delighted for you press plate. 
 

I foiled the image onto the pinkfresh studio watercolor paper (releasing soon). Next add some color to parts of the image using the ocean breeze, turquoise, grassy knoll inks through the stencils. 


I  love the effect of partially colored images on this card. Die-cut the panel using the Diagonal Stitched Rectangle die. Sponge the ink to the corners of the panel. Flick some ink to it. 
Stamp the sentiment from the Amazing Things stamp set using versamark ink onto teal card. 
 

Sprinkle WOW! Opaque white embossing powder and heat set. Die-cut using the coordinating dies. Adhere to the card. To finish, I added some Sparkle and Shine glitter drops.

GIVEAWAYS:
Pinkfresh Studio will be giving away the full release on the Pinkfresh blog & YouTube channel.
As well as a total of TEN $25 gift cards along the hop. As per usual with blog hops - the winners will be picked from the comments.
Pinkfresh Studio will pull the winners & post them on May 7, 2024 on their GIVEAWAY PAGE. Don't forget to check that page & claim your prize within 2 weeks. 
 
AND, Pinkfresh is celebrating their10th year anniversary this month and they have planned an amazing freebie for the release. They have a new retail website and a lot of new features. Which will add a freebie to customer's cart without adding any coupon code. It will show up for qualified orders.YAY!!!


Here is the link to complete HOP list


Friday, April 26, 2024

Pinkfresh Studio - Creating Cards On Dark Backgrounds

 Hello everyone! I am on the Pinkfresh Studio card blog with two cards featuring the Vines and Roses product suite. I normally create pastel, vibrant cards but the dark backgrounds have their own elegance, so I decided to share two card designs.

I used various colors of stripes to add pops of color to this design.

I started by using the Dotted Petals press plate, inked it with Regal Kiss ink and took the impression using the Betterpress Letterpress system. Next, I die-cut this piece using the Notched Corner Frames dies. Adhere the stripes diagonally.

Stamp the images using Vines and Roses stamp onto vellum using versamark ink, sprinkle white embossing powder and heat set. Die-cut using Vines and Roses die.


Add color to some of the leaves and flower using copic markers and create a cluster. Stamp the sentiment using Detail Black ink, die-cut.

Stack three more die-cut for some dimension. To finish, add some Enchanted Forest Glitter Drops.

For the next card I used the Vines and Roses washi tape. I love the rainbow color effect. 

Adhere the washi to a white card, die-cut using the coordinating dies.


Die-cut a vellum label using the Basic Label Frames die set. Adhere the stamped sentiment to it using 3d foam and now adhere the vellum to the panel.


This is such an easy card to make but the gold foiling on washi and the details make it look so elegant.

Thank you for dropping by and have a nice day.

Friday, April 12, 2024

Pinkfresh Studio - Mini Slimline Shaker Card

 Hello everyone! I am on the Pinkfresh Studio blog today with a mini slimline shaker card featuring the beautiful Sakura Stamps, Dies and Stencils. This bundle also comes with beautiful washi, which helps create cards in no time.

To start, I sponged a white panel from top and bottom using the Summer Shower and Seaside inks. Dab seaside ink onto mat and with a wet brush flick some splatters, then add splatters using the White ink. Die-cut this panel using the Mini Slimline Essential Bundle. Next, die-cut a circle from this piece. Adhere this circle piece to the white cardbase.

Stamp the images using the Detail Black ink. Sponge the images using (Sparkling Rose, Raspberry Bliss, Mulberry Blush, Grassy Knoll, Olive, Spanish Moss) inks through the stencils. Die-cut using the dies.

Stamp the sentiment and die-cut it. Adhere a piece of acetate behind the inked panel. Add 3 d foam all around the circle, add some Glitter Drops: Blush and Clear with Gold Dust Gems. Add another piece of acetate to close the shaker window. Adhere this layer to the card.

Using liquid adhesive, insert in the sentiment into the opening. Create the floral cluster as per the liking by adding some parts of the extra images. Adhere these to the card and the shaker card is ready.

Thank you for dropping by and have a nice day!

Friday, March 29, 2024

Pinkfresh Studio - Masculine Cards

Hello everyone! I am on the Pinkfresh Studio blog today and decided to share masculine cards using similar products. I used the Fluttering Butterflies Stamp, Washi, Fluttering Butterflies Dies, Notched Corner Frame dies along with the Stippled Plaid press plate, Happy Vibes Stamp, Happy Vibes Dies.

First I decided to use a soft and happy color palette.


I started by using the press plate with the Betterpress Letterpress System without inking the plate for a soft texture. Next, I used masking technique and sponged inks (Rocky Slope, Sky Blue, Lemon Whip). Inking inks this way enhances the texture of the plate and I love the clean straight lines for a boy card. Adhere this panel to a light blue cardbase. 
 

Next I stamped the image onto vellum using watermark ink, sprinkle opaque white embossing powder, heat set. Die-cut the image. Add color to part of the image using alcohol markers.

Stamp the sentiment from the Happy Vibes stamp set using Detail Black ink, die-cut. Assemble the cluster and adhere the sentiment using 3d foam.


For the 2nd card, I used a bold color palette, still keeping some softness. 
 
 
I applied Stargazer ink to the press plate and used Betterpress system to get the effect. Die-cut this panel using the Notched Corner Frame die and adhere to a blue cardstock. 
 

Die-cut a smaller white panel, sponge Lemon Whip ink to the top and Hydrangea ink to the bottom. Adhere to the card using 3d foam. Adhere the Washi to vellum, die-cut.

 Vellum gives a soft and beautiful look by keeping the washi texture. Create the cluster. Stamp the sentiment using Stargazer and Opulence inks, die-cut and adhere to the card.


Hope these cards gives you some inspiration on how we can easily create masculine cards with very different style by using the similar supplies.

Have a nice day!

Monday, March 25, 2024

Pinkfresh Studio “Artsy Floral” Release

Hello everyone! I am so excited to join the Pinkfresh Studio "Artsy Floral" release. This release is packed with stamps/dies/washi for everyone's liking. 

I am featuring the Fluttering Butterflies today. There are so many beautiful butterflies in various profiles and the leafy twigs really compliments to create gorgeous projects. 

For my first card I used the Fluttering Butterflies stamps and the dies along with the new Notched Corner Frames and Clear Gems with gold dust. I also used some of the previously released products, all are in the list below.

To start, I die-cut a frame using the Ivory Glitter cardstock. Next, take a white panel, sponge Lemon Whip and Sparkling Rose inks. Add gold splatters to this piece. Use the Diagonal Stitched Plaid plate to add some more texture.

Next I stamped the images onto watercolor paper using versamark ink, sprinkle WOW gold pearl embossing powder and heat set. Add color to the images using the new watercolors (coming soon). I also stamped  the images onto vellum and embossed using opaque white embossing powder. Die-cut all the images. Adhere the frame using 3d foam to the card and create the cluster.

To finish, add a sentiment and some gold dust gems.

For the second card, I took a light pink panel, added white ink using a brayer for a soft look. 

 
I added some texture using the Diagonal Stitched Plaid plate. I then die-cut a frame using the Ornate Oval Frame and Glacier Glitter card.Adhere to the card using 3d foam. 
 

Stamp the images using black ink, add color using blender brushes and inks (Lemon Whip, Waterfall, Sparkling Rose, Coral Reef, Raspberry Bliss, Berrylicious, Gathered Twigs, Citron, Sage, Eucalyptus, Bay Leaf, Spanish Moss) through the coordinating stencils.


Die-cut the images, create the cluster using the stamped images and the vellum leaves. To finish add some Ombre glitter drops: Twilight

GIVEAWAYS:
Pinkfresh Studio will be giving away the full release on the Pinkfresh blog & YouTube channel.
As well as a total of TEN $25 gift cards along the hop. As per usual with blog hops - the winners will be picked from the comments.
Pinkfresh Studio will pull the winners & post them on April 2, 2024 on their GIVEAWAY PAGE. Don't forget to check that page & claim your prize within 2 weeks.

Here is the link to complete HOP list
CLICK HERE TO ENTER