Friday, September 25, 2020

Lawn Fawn - Autumn Theme Shutter/Shaker Interactive Card

Hello everyone! Today, I have another cute and adorable interactive fall theme card using the Lawn Fawn newest interactive Shutter Die. There are so many adorable things in the Scraphouse shop in Switzerland. If you see something is not available, you can always check with Marjolein, if she can get it next time :)

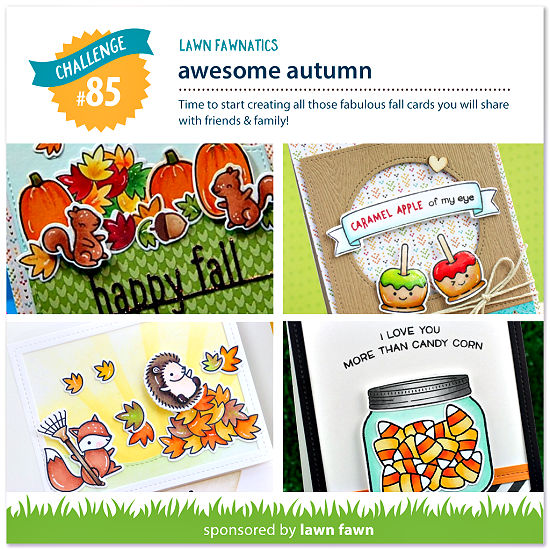
I made an Autumn theme card
for the Lawn Fawn lawnfawnatics challenge 'awesome autumn' as I love the colors of Autumn and I really wanted to color these cute bears :)


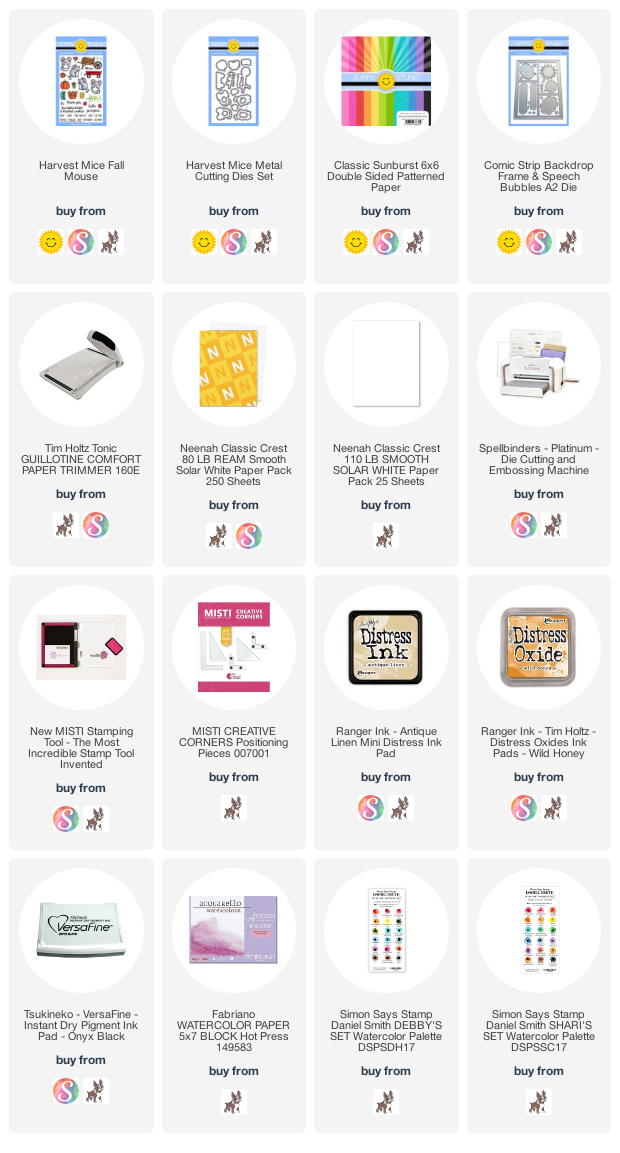
I used the Lawn Fawn Cuts Shutter Die along with some of the other stamps, dies and pattern papers.
Here are some of the card photos


I sponged squeezed lemonade, picked raspberry and wilted violet distress oxide inks to create the sky. I used peeled paint distress oxide for the grass.Then I flicked some iridescent and gold watercolor to the sky part.

I used some leaf dies, added the same distress oxide inks and also some gold paint. I created a shaker element too for the inside of the interactive shutter part.


Here is a small video to see the card in action :)


Thank you for dropping by! Have a nice day!

Wednesday, September 23, 2020

Studio Katia - Wishing You Card

Hello everyone! I am on Studio Katia blog today with a CAS card using stencil. 

 
I started by creating the background. I sponged some spun sugar, worn lipstick, picked raspberry and wilted violet distress oxide inks to the white cardstock using the blender brushes. I then took the Autumn Leaves stencil and put it on the inked piece. I then applied versamark ink through the stencil. Remove the stencil and dab some perfect pearls to the piece. Die-cut the heart, adhere the positive to the white cardbase, adhere vellum on top. Now adhere the negative part of the layer to the cardbase. Stamp sentiment from the It's your Birthday stamp set onto vellum using StazOn black ink. Die-cut the word YOU from the Chunky Alphabet die four times from white cardstock. Stack them, apply some clear sparkle on it and add glossy accent. Let dry. 
 
 
Adhere the word to the heart center. To finish, add some Icy Sparkle Crystals. Thank you for dropping by! Have a nice day and stay safe!
 

Tuesday, September 22, 2020

Sunny Studio - Merry Christmas Card

 Hello everyone! I have a Christmas Card featuring all of the newest Slimline dies over on Sunny Studio blog today.

Slimline dies are very popular at the moment, so I am thrilled that Sunny Studio introduced these dies! and the best part is to have the various borders and the nature borders dies as well.

I started by die-cutting the main mat layer using the Slimline Scalloped Frame die. I sponged it using tumbled glass distress ink towards the top. I then die-cut some clouds and snow hills using the Slimline Nature Border dies. I sponged the edges of these using distress ink. Flick some iridescent watercolor, distress ink to all these panels and let dry.

I then die-cut the borders using the Slimline Borders die and colored them using copic markers to match my ornaments. Adhere to the mat layer.

Die-cut some trees from the Rustic Winter Dies. Adhere to the layer and then adhere the clouds and the snow hills. apply some stickles.

I then took Tim Holtz yupo paper and added some pearl alcohol ink, let dry. I then stamped one of the layer of the baubles using Retro Ornament stamp with versamark ink, sprinkle WOW! gold pearl embossing powder and heat emboss. Die-cut the baubles using coordinating dies.

Finally, I stamped the fir leaves using distress inks in various shades of green and peacock feathers using Classy Christmas Stamp set. Add some water using a damp brush. Die-cut using the coordinating dies.


Stamp and emboss the sentiment onto vellum. Assemble everything together.

Hope you enjoyed this project. Thank you for dropping by! Have a nice day!!

Sunday, September 20, 2020

MFT 2020 Card Design Superstar Challenge: Innovation Master Category

 Hello everyone! I am so excited, MFT is hosting the Card Design Superstar Challenge again. This is my last card for the challenge which is for the Innovation Master category. This is a 3in 1 interactive card, I created 3 interactive elements (pull tab, shutter card and shaker) 

I didn't have a pull tab die so I had to improvise a bit. I cut the slit using the x-acto knife and have used a tab die from stash.

Here is the card in action

Here is the card


I started by creating the shutter card base. Stephanie has this awesome tutorial HERE

I sponged the sky area. I then used post-it to create mask to sponge ink to create grassy hills. I then stamped all the images, colored them and die-cut. I adhered the image of the cute gnomie inside the shutter part, sprinkle some chunky glitter and adhered acetate over it.

Stamp the grass, adhere the images and the inside is finished :) The shaker is the surprise once we open the shutter :)

Now to create the pull tab, I simply cut a 1.25 inch long slit in the pattern paper, where I wanted my turtle to move. I then cut a long sleeve to use as pull function. There are few tutorials on youtube so I had to make my own measurements but it worked out beautifully. I then created the band. I adhered the Gnomie house to the band and placed on the card so when we pull the tab, we can see the turtle peeking from behind. I did add 2 more stripes of the same pattern paper to hide the slit and turtle body so when we remove the band, the card still looks clean :) You can see that in the video. Check it out how the turtle peeks through. 

I really love interactive cards and can't stop playing myself...lol. 

Have a nice day and stay safe!

Saturday, September 19, 2020

MFT 2020 Card Design Superstar Challenge: Coloring Virtuoso

Hello everyone! I am so excited, MFT is hosting the Card Design Superstar Challenge again. This is my card for the Coloring Virtuoso challenge. I love flowers, I wish I had the newest GORGEOUS florals from MFT but I found these older ones Painted Petals stamp and decided to use them. They were a bit of a challenge to color because of their layering and abstract style but I love to challenge myself and went for no-line watercolor effect :)


I used Daniel Smith watercolors to color in the images after stamping them with antique linen distress ink. Fussy cut them and created the cluster. For the sentiment I used Sweetest Somebunny stamp set, I stamped and embossed the sentiment using white embossing powder and added a touch of watercolor.
 
 
Thanks for dropping by! Have a nice weekend.

Lawn Fawn - Interactive Shutter Christmas Card

 Hello everyone! Today, I have a cute and adorable interactive card using the Lawn Fawn newest interactive Shutter Die. There are so many adorable things in the Scraphouse shop in Switzerland. If you see something is not available, you can always check with Marjolein, if she can get it next time :)

I used the Lawn Fawn Cuts Shutter Die, Shutter Card Holiday Sayings stamp, Snow Globe Scenes, along with some of the older stamps and dies. I used some of the older pattern papers but you can use any papers or stamps you like.

Here are some of the card photos


I sponged Tumbled Glass distress oxide ink and then flicked some iridescent watercolor and tumbled ink distress ink.


I added lots of stickles to the card to create snow.


Here is a small video to see the card in action :)


Have a nice day! Stay safe!

Thursday, September 17, 2020

MFT 2020 Card Design Superstar Challenge: Clean & Simple Genius

Hello everyone! I am so excited, MFT is hosting the Card Design Superstar Challenge again. I cleaned my desk a couple days back and found these GORGEOUS butterflies. These are so pretty that I just wanted to highlight them and the Clean and Simple Genius challenge is perfect for this stamp. 

Clean and simple for me is all about white space, design rules: here I have repetition, movement and rule of thirds for the sentiment. Now there is color theory too and we can't beat the rainbow colors. Rainbow colors make me happy :)

 I went for a slimline card. 

I started by stamping the base of the butterflies. I then took 2 shades darker ink and stamped the detailed wings. Finally, I stamped the center of the butterfly.

Next step was to apply Spectrum Noir clear glitter pen to the solid parts of the wings except the part underneath the detailed wing. I then added some details using white gel pen for added texture.

Stamp and emboss the sentiment. Die-cut the word hello, offset it using black die-cut. Adhere to the card. 

Have a nice day! Stay safe :)

Tuesday, September 15, 2020

WOW! Embossing Powder - Shaker Card

Hello everyone. I am on WOW! Embossing powder blog today. Hope you are enjoying all the Christmas projects for our September challenge over on facebook. Have you started making your cards yet? Today, I have a fun shaker card for you all using some of WOW! Sparkles.


I used Sunny StudioStitched Semicircle and Slimline Nature Borders dies along with Studio Katia Happy Snowmen stamps and dies, clear acetate sheets.

I started by die-cutting the semi circle from a white cardstock. I then put it on the cardbase and marked the position of the opening.

Stamp the tiny snow using WOW! Clear Slow Drying ink, sprinkle Opaque White embossing powder. Heat emboss using WOW! Dual heat tool.

I then stamped the trees and used Aventurine embossing powder to emboss them. This is a beautiful mix of color and glitter.

Sponge salty ocean distress ink in an ombrè to highlight the sky. Stamp the snowmen, color using copics and die-cut.


Die-cut 2 hills using vellum, sponge some blue ink and adhere to the back of the opening. To start the shaker we will adhere acetate sheet to the back of the semi circle opening. Add adhesive stripe all around the opening and the edges. Make sure there is no area without adhesive left around the opening. Add some Sparkles: Your Carriage Awaits, Starlight and Glass Slipper to the cardbase. (The Sparkles have to be only in the center of the card). Adhere the die-cut front panel to the cardbase. Now we have a flat shaker card ready.


Adhere the snowmen and a sentiment stripe embossed using Opaque White embossing powder.


Hope you liked my creation. Have a nice day!

Wednesday, September 9, 2020

Sunny Studio - Hello Interactive Card

Hello everyone! Today I have a fun interactive card using the adorable Scaredy Cat set by  Sunny Studio. I really love this cute image and the first thing came to my mind was to create an interactive card using an action wobbler :)

I started by die-cutting the semi circle using Stitched Semi Circle die. I then adhered the white negative  part to the card base. Sponge distress oxide inks to the background. Now I die-cut some birch trees using Rustic Winter Dies. Adhere to the inked piece. Die-cut the grass using the Slimline Nature Borders die. Sponge distress oxide inks.

Stamp the images using Scaredy Cat, Bountiful Autumn, Farm Fresh stamp set onto Neenah card. Color using copic markers and die-cut using coordinating dies.

Adhere the grass to the inked panel and adhere all the images. Adhere mini action wobbler at the back of the cute cat image. Adhere to the card. Adhere this semi circle piece to the card.

Here is the interactive part in action :)


Thank you for stopping by. Have a nice day!


Tuesday, September 8, 2020

Studio Katia - Happy Thoughts Mixed Media Card

 Hello everyone, I am on Studio Katia blog today with this mixed media card.

I started by applying some distress inks to the mat layer, let it dry. I then applied embossing paste through the Honey Comb stencil. Sprinkle WOW! Rose Glintz and Bleutiful embossing powder while the paste is still wet. Heat emboss. Apply some white acrylic paint to parts of the background.


Stamp and emboss the beautiful floral and a few extra leaves. Adhere to the card.

Stamp the sentiment onto a watercolor paper stripe and add a touch of cracked pistachio distress ink.
Adhere to the card using 3d foam.

To finish, add some Icy Sparkle Crystals and Iridescent bubbles tiny.

Thank you for dropping by! Have a nice day and stay safe!
 

Wednesday, September 2, 2020

Sunny Studio: Have A Mice Day Card

Hello Everyone! I am on Sunny Studio blog today sharing a no-line watercoloring technique card with you featuring the Harvest Mice Stamp set.
These mice are so so adorable and the coordinating stamps are perfect to create beautiful scenes.


Firstly I stamped the images onto watercolor paper using Antique Linen distress ink. Color them using watercolors. We can get beautiful no-line color look using antique linen ink. Die-cut the images using the coordinating dies.
 
Die-cut the speech bubble die twice, once using white cardstock and second time using the pattern paper. Sponge wild honey distress oxide ink to the white inside parts. flick some ink. 
Adhere the pattern paper die-cut to the kraft cardbase. Adhere the white inside panels. Create the scene using the colored images. I used 3d foam on some of the images to create dimension and more interest.
Stamp the sentiment, die-cut the speech bubble, adhere the grey bubble slightly offset.
Thanks for dropping by!
 

Tuesday, September 1, 2020

WOW! Embossing Powder - Merry Christmas Card

Hello everyone, I am on WOW! Embossing powder blog today. Hope you are enjoying our September challenge over on facebook and the theme is "Christmas". It's perfect time to start on the Christmas cards for sure :) I love lots of sparkle in my cards for the holiday season.


I used Sunny Studio Christmas Trimmings, Classy Christmas, Season's Greetings stamps and dies along with the Fancy Frames Rectangle dies.

To start, I stamped the pine leaves using WOW! slow dry ink and embossed them using the Green Glitz and Aventurine embossing powders. Mix of colors gives additional interest to the image. I die-cut the frame, dabbed slow drying ink and sprinkled Sparkling Snow embossing powder. Heat emboss.


Take a watercolor mat layer and smoosh some watercolors to create the background. Once dry, adhere the pine leaves. Now adhere the frame.

Stamp the berries and die-cut. Stamp the sentiment and emboss it using Metallic Platinum embossing powder, die-cut. Adhere to the mat layer.


To finish, adhere the mat layer to a blue/green card base. Hope you liked my creation. Have a nice day!