Friday, August 28, 2020

WOW! Embossing Powder & Kat Scrappiness Blog Hop

Hello and Welcome to the WOW! Embossing Powder & Kat Scrappiness Blog Hop! We have TWO days of inspiration for you using Kat Scrappiness Stamps, Dies, and Embellishments and WOW! Embossing Powders.
 

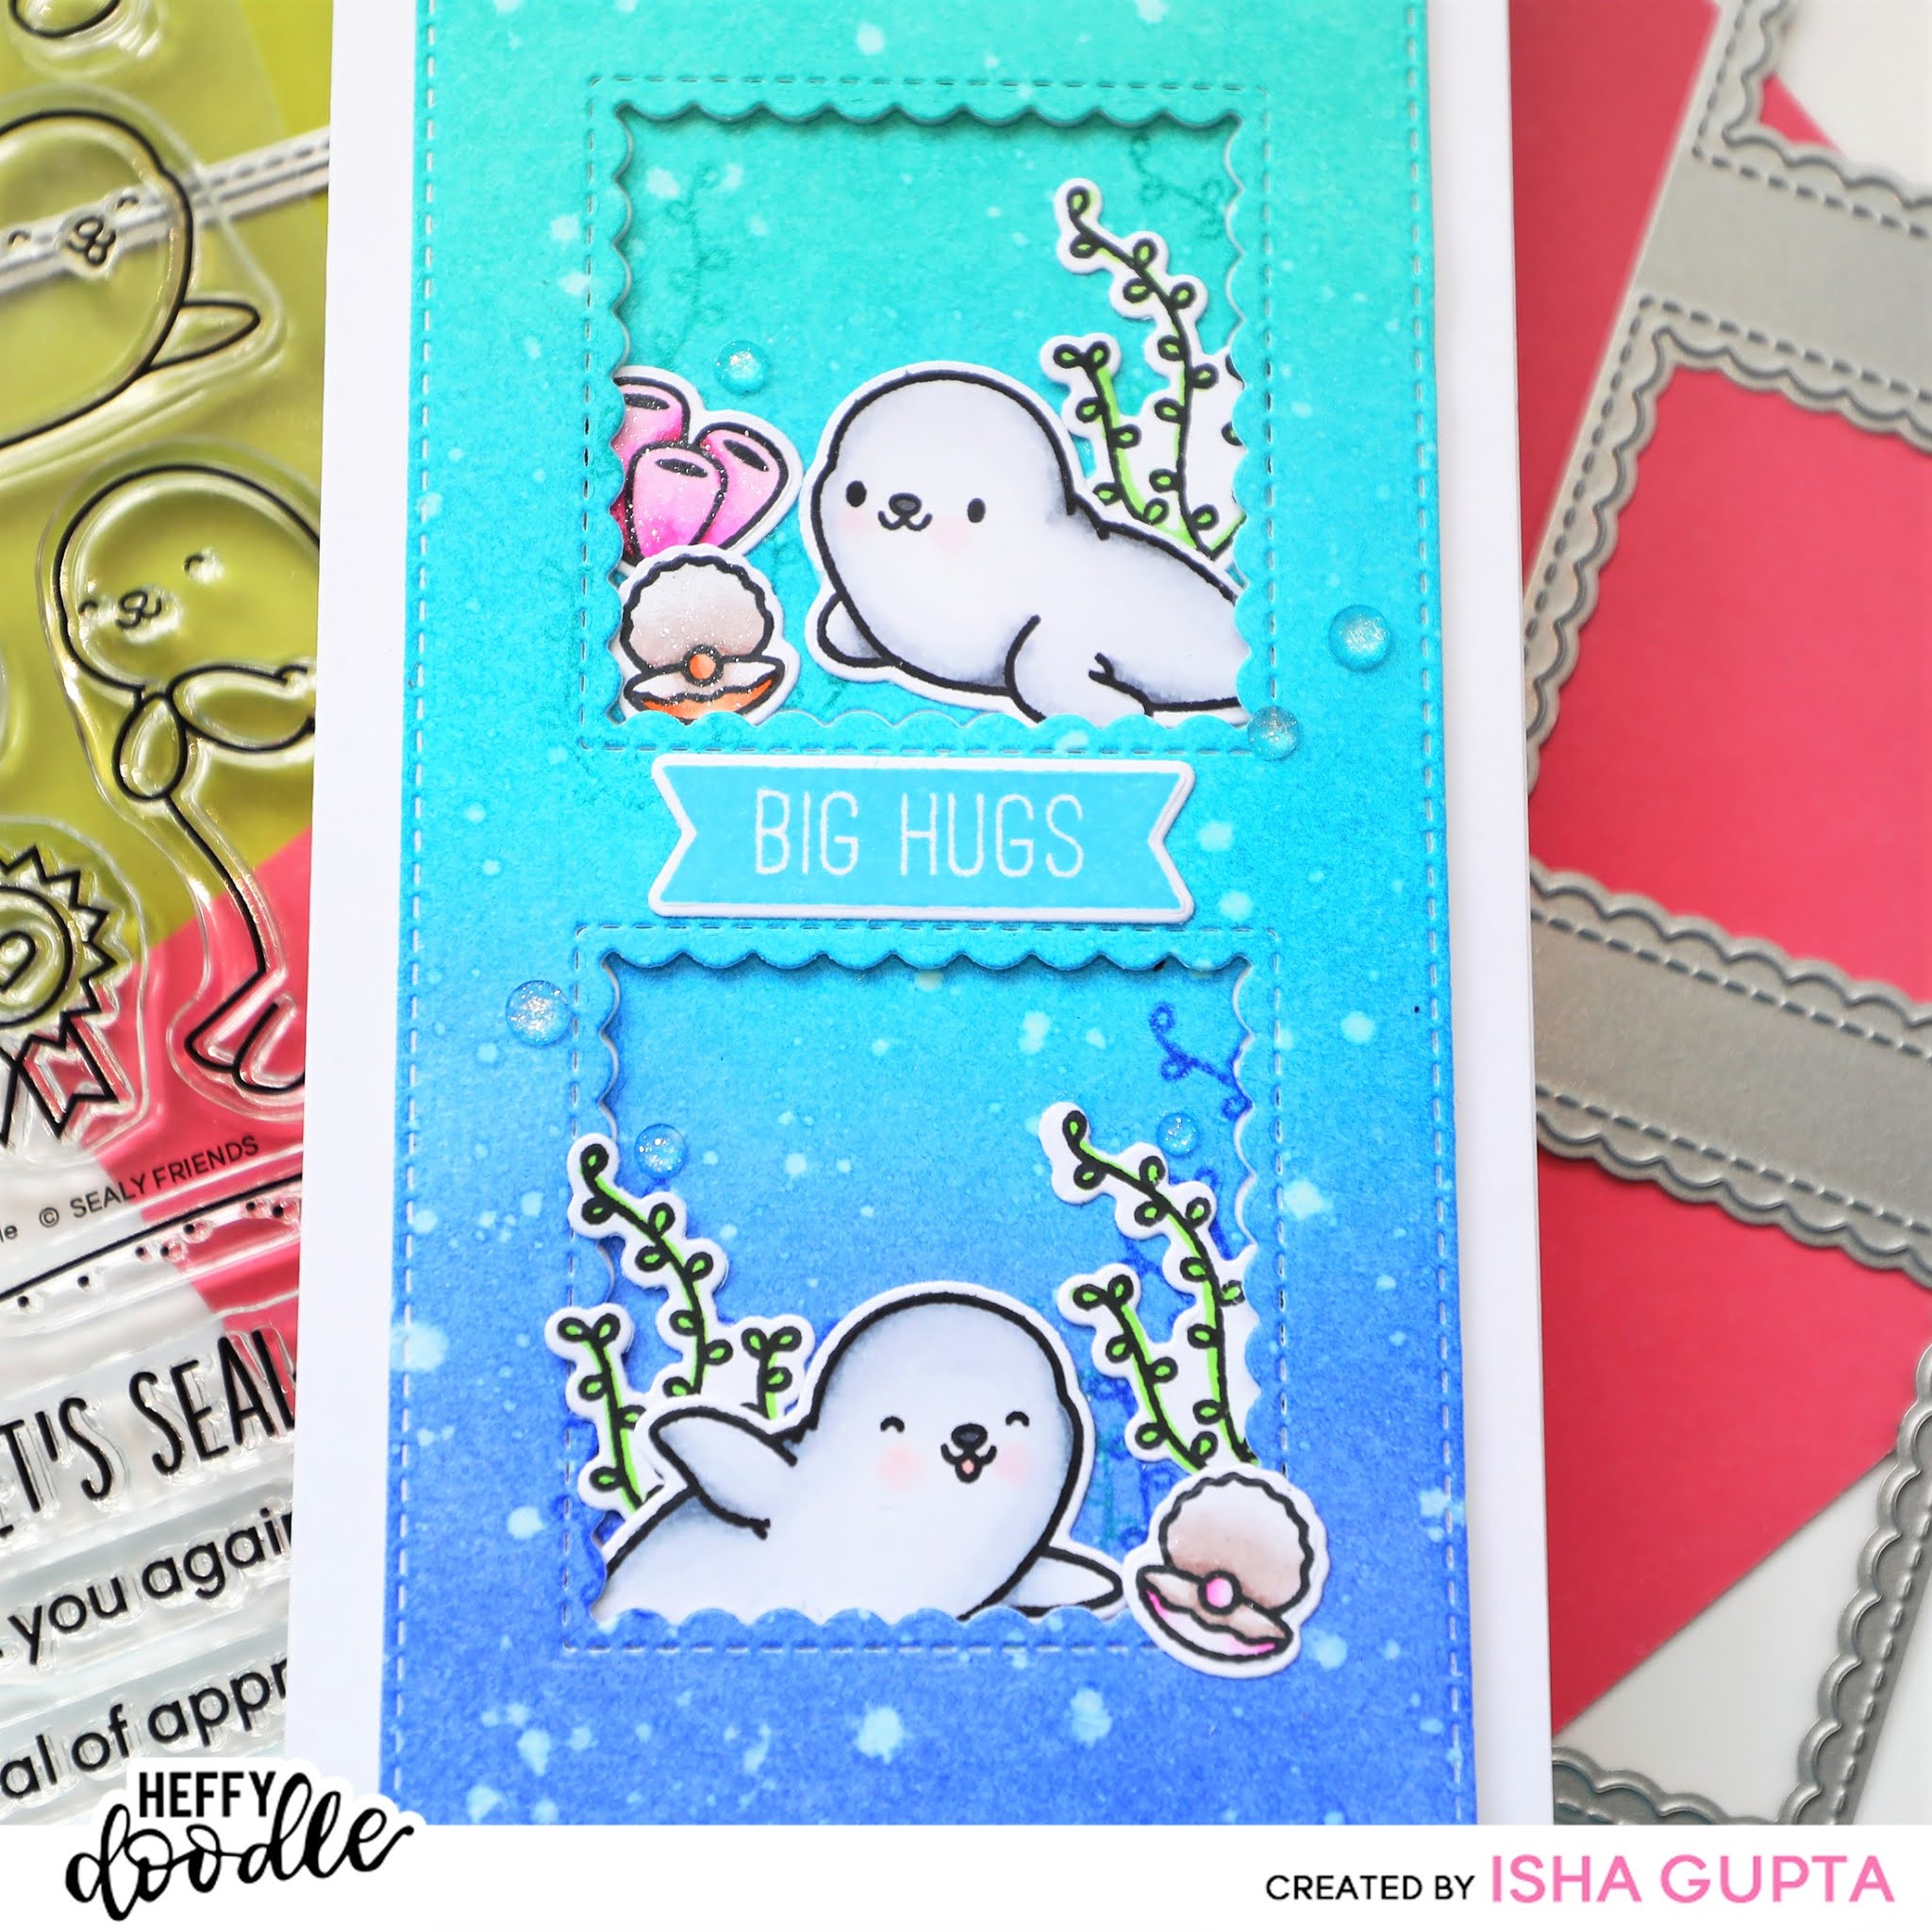
I made a fun shaker card with no-line coloring technique.
You should have come here from Priscilla Bergman Joseph's blog. 
 
 
Actually, I have used the Kat Scrappiness products for the first time and I really like them. For today, I used WOW! Atlantica Sparkles in the shaker along with Opaque Bright White ep and Kat Scrappiness - - Lola the Giraffe stamp and die. Thank You with Shadow Die.
I started by szamping the image onto copic friendly paper using antique linen distress ink and colored it using copic markers. I sponged the background and diecut the Thank You using the shadow die. 
I then adhered clear acetate at the back side of this panel and added score tape all around it.

I then put some Sparkles - Atlantica onto the cardbase. Adhere the mat layer to the card. This creates a flat shaker card. I then die-cut the word Thank You, dabbed WOW! clear slow drying ink, sprinkle with Opaque White embossing powder and used the dual heat tool. Adhere the word inside the shadow opening. Adhere the image.


To finish, I die-cut some butterflies, color them with copics and adhere to the card.
 
And of course there are amazing PRIZES!
WOW! Embossing Powders is giving away a $25 Gift Certificate to either their UK or USA Store and Kat Scrappiness is giving away a $25 Gift Certificate to their store. All you need to do to win is COMMENT. The more blogs you comment on the more chances you have to win! The winners will be chosen at RANDOM from ANY of the blogs on the two day hop.

Enjoy the hop and have a nice day!

Tuesday, August 25, 2020

Sunny Studio Stamps: Hello

 Hello Everyone! I am sharing a playful Autumn theme slimline card using some of the new release products.  

I started by die-cutting the grass and sponged distress oxide inks. Stamp the grass stamp. It’s light color just for texture.

Stamp all the images and color using copic markers. Die-cut using the coordinating dies.


Die-cut the clouds, sponge some distress oxide ink to them.

Die-cut the center panel using the slimline die, sponge shades in blue to create the sky. Adhere the grass panels and the images to this panel. I adhered some of the images using 3d foam too to create some dimension. Mat it using a dark grey panel. Adhere this panel to the slimline scalloped frame card base.


Stamp the sentiment from the Harvest Mice stamp set.

Hope you enjoyed my card as much as I enjoyed creating it :)

Thanks for dropping by!


Saturday, August 22, 2020

Sunny Studio Stamps 5th. Birthday Blog Hop

Hello everyone! I am so excited to finally tell it loud that I am part of the Sunny Studio Stamps design team. I have loved their products since they started and this is a great honour. Thank you Mendi :)

Today, we are celebrating
Sunny Studio Stamps 5th. Birthday with a blog hop and are sharing projects our new release.


You should have come here from sweet and very talented
Franci's blog.

For my card I used the Classy Christmas Stamp set along with the coordinating dies and Season's Greeting stamps with coordinating dies.


I went for no-line watercoloring technique. For that I used antique linen ink to stamp the images and colored them using Daniel Smith watercolors. Die-cut and plan the cluster. I then took a watercolor panel and added watercolor wash to the corners. Adhere the images.


Finally, I stamped the sentiment using versamark ink and embossed it using WOW! Metallic Gold Rich embossing powder. Die-cut and adhere to the card.

Prizes
There's a $25 gift code on all the blogs participating in the hop.Also there are giveaways to one for each of our sneak peek blog posts for a total of $525 in prizes. All you have to do to win is comment through Wednesday, August 26th 11:59 pm PDT on all the blogs and
Sunny Studio Stamps blog.

I will pick a winner on my blog. All the winners will be emailed their shopping codes and shared on the Sunny Studio blog on Sunday, August 30th. :)

There's MORE


All orders will automatically come with a free mini poinsettia die. We have a couple different promotions going on, but only one discount can be used per order so you will need to choose the one that has the biggest savings for yourself. We have free US shipping on all orders over $25 using the code FREESHIP or we have 20% off all Sunny Studio Branded Products (excluding the new release and retired products) using the code FIVEYEARS through Wednesday, August 26th at 11:59pm PDT.
Next stop in the hop is wonderful
Juliana.

Hopping order:

Here are the supplies I used. If you wanna see more of my creations, please follow me on Instagram HERE


Friday, August 21, 2020

Studio Katia: Hello Bridge Card

Hello everyone! I am on Studio Katia blog today with a Hello bridge card. This is a fun and different shaped card.
 
 
Here you can see the card in action :)


To start, I took a 51/2 wide by 51/4 high white cardstock. Score at 1 and 13/4 th inch, turn the cardstock and score again. Cut a piece of pattern paper and adhere to the inside panel. Cut 2 more thin stripes and adhere to the edge of the card.

Stamp the image using versamark ink and emboss using WOW! Gold rich embossing powder onto watercolor paper. Color using zig clean color real brush markers.

 
Cut the outside of the image using scissors. Die-cut the inside using circle die. Stamp the sentiment onto vellum using StazOn black ink. Adhere this stripe behind the floral image.

Close the left scored flap, adhere the wreath only to the edge of the image. Adhere the right edge of the image to the right panel. Here is how the card looks.

 
To finish, add some Satin Rainbow Confetti.

Thank you for dropping by! Have a nice day and stay safe!
 

Tuesday, August 18, 2020

Heffy Friends Blog Hop!

 Hello everyone and welcome to the Heffy Friends Blog Hop. Today we are celebrating the Heffy Doodle July 2020 release with lots of inspiration and a giveaway, too!


It's gonna be a long post so take your favourite drink and enjoy :)
Since it's a long post I will keep the details short but if you have any question, feel free to write in comments, I will respond.
 
Card 1
 
 
I started by sponging ink to create my mat layer. Die-cut it. Adhere the pieces to the cardbase. I used 3D foam to the outer frame for dimension. Color the images with copic markers, die-cut and adhere to the card. To finish, I added some crystals and zig clear sparkle.


Card 2

 
I sponged ink to my layer. Now I mixed some fine glitter to the transluscent embossing paste and applied it through the cloudy stencil. Love the subtle sparkle. I then die-cut some cloud borders, sponge ink and adhere to the layer. Stamp and color the image, die-cut. Emboss the sentiment using silver embossing powder by WOW! Embossing Powder. Adhere the layer to the scallop layer and then to the card.
To finish, add some pastel rainbow confetti.

 
Card 3

I die-cut some waves using the Breaking Waves border dies. Sponge some distress inks, flick water. Stamp and color the images using copic markers, die-cut. Adhere everything to the cardbase and adhere the white skinny rectangle frame.

 
Card 4

I love making interactive cards and this slimline pull tab dies are perfect for it. I love the Unicorn peeking through the glittery rainbow. I created the background by sponging distress inks through the stencils. Stamp, color and die-cut the unicorn. Die-cut the clouds, add a touch of color and add sparkle by using zig wink of stella clear sparkle.
I die-cut the rainbow using colored glitter cardstock and used the stars to accent the card. I attached the unicorn to the pull tab so when we pull it, it peeks through.


Card 5
 
 
 I never got a chance to share this card and I really love it so much. I sponged ink to the mat layer, then I added some more ink through the stencil. Stamp the images, colored them using copic markers and die-cut. Add details using white gel pen.
Assemble everything together and adhere the skinny rectangle frame to finish.

 
Giveaway info

To celebrate the hop Heffy Doodle will be giving away a £50 voucher to the Heffy Doodle Store!! Make sure to comment on each stop in the hop to be entered for your chance to win. The winner will be selected randomly and announced on the Heffy Doodle blog on August 25th.

LINEUP

Heffy Doodle Blog

Thanks for dropping by! Have fun hopping :) If you like to see more of my creations, please follow me on INSTAGRAM.


WOW! Embossing Powder: Masculine Best Day Ever Card

Hello everyone. Hope you are enjoying our August challenge over on facebook and the theme is "Masculine".

The DTs have been challenged to use Blue/Green and Teal hues. WOW! has plenty to choose from so for my card I picked one of my favourite Vintage Peacock by Marion.


I started by die-cutting the mat layer using Heffy Doodle Metric Stitched Rectangle die. I then took Square Brick and Grid stencil by Studio Katia. Layer them and adhere some washi tape. Brush cracked pistachio and salty ocean distress oxide inks through the stencil.
Die-cut the letters "YOU" five times, stack them except one layer. Apply clear slow dry ink and sprinkle the Vintage Peacock embossing powder to it. Emboss using dual heat tool. Repeat the process and adhere this to the stack of letters. This gives such a wonderful 3D chipboard effect.


Stamp and emboss the rest of the sentiment using white embossing powder onto black card. Adhere to the card and assemble everything together.


Hope you got inspired and don't forget to add your creations to our facebook group, we would love to see your creations :)

Thank you for dropping by! Have a nice day!

Friday, August 14, 2020

Studio Katia: Birthday Card

Hello everyone! I am on Studio Katia blog today with a birthday card. I decided to create the background using stamping by stencil technique and for the main focal image, I colored it using copic markers.


First I stamped the image from Mini Birthday Cake onto alcohol friendly paper and colored it using copic markers. For today's image, I played with deep colors to give more dimension using dark shadows. Die-cut the image. Now to create the background, I used the Autumn Leaves stencil, spritz it with Imagine Sheer Spritz Gold and a little water. Put the stencil upside down onto the cardstock, let it stay there for a couple of minutes and remove. Let dry. Die-cut the tag from the Dotted Patterns Set 3 using vellum. Stamp the sentiment and emboss using WOW! Chocolate Caramel Pearl embossing powder.

 
Adhere the mat layer to pink card. Adhere the cake image using 3d foam tape to the vellum tag. Adhere the tag to the card. Now add glossy accents to the candles, nuvo aqua shimmer to the frosting. To finish, add some Rouge Pink Crystals. 
Thank you for dropping by! Have a nice day and stay safe!
 

Saturday, August 1, 2020

WOW! Embossing Powder: Happy Birthday Card

Hello everyone. I am on WOW! Embossing Powder blog. Today is the start of our August challenge over on facebook and the theme is "Masculine". Now, I don't make masculine cards that often so this is perfect opportunity to have some masculine cards in my stack :)
The DTs have been challenged to use Blue/Green and Teal hues. WOW! has plenty to choose from so for my card I picked Sea Of Tranquility, Space Dust by Seth Apter and Oiled Slate by Jo Firth Young.


I started by die-cutting the mat layer using Heffy Doodle Metric Stitched Rectangle die. I then used a cloud stencil and brushed some mustard seed oxide ink through them to create the background.

Now, I took some translucent texture paste to my mat, added Glass Slipper and Your Carriage Awaits Sparkles to it. Mix with a palate knife and apply through the Confetti Stencil by Heidi Swapp.
Stamp the layering Balloon by Sunny Studio. I added embossing powder to the last layer. I then took the WOW! Embossing pen and added a few dots and details to the balloons. Heat set it using the dual heat tool.

Stamp the strings to the layer and adhere the balloons using 3D foam.


Stamp and emboss the sentiment.


I really like to add details using the embossing pen. Hope you got inspired and don't forget to add your creations to our facebook group.
Thank you for dropping by! Have a nice day!